
Forums › General Discussion › Filled Keel Problems
- This topic has 21 replies, 8 voices, and was last updated 12 years, 9 months ago by
Anonymous.
-
AuthorPosts
-
-
January 10, 2014 at 7:31 am #68840
Anonymous
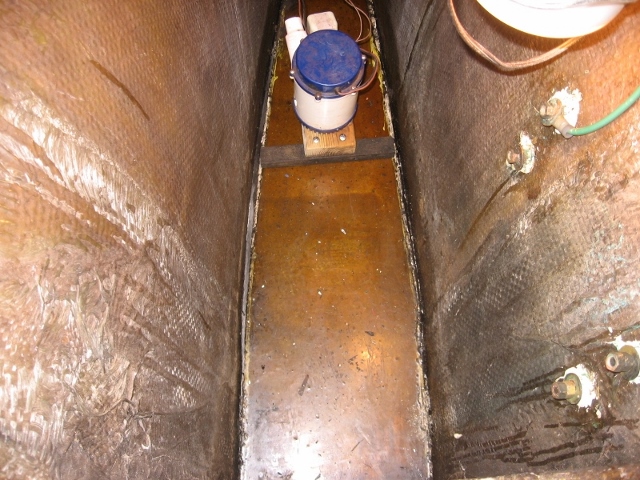
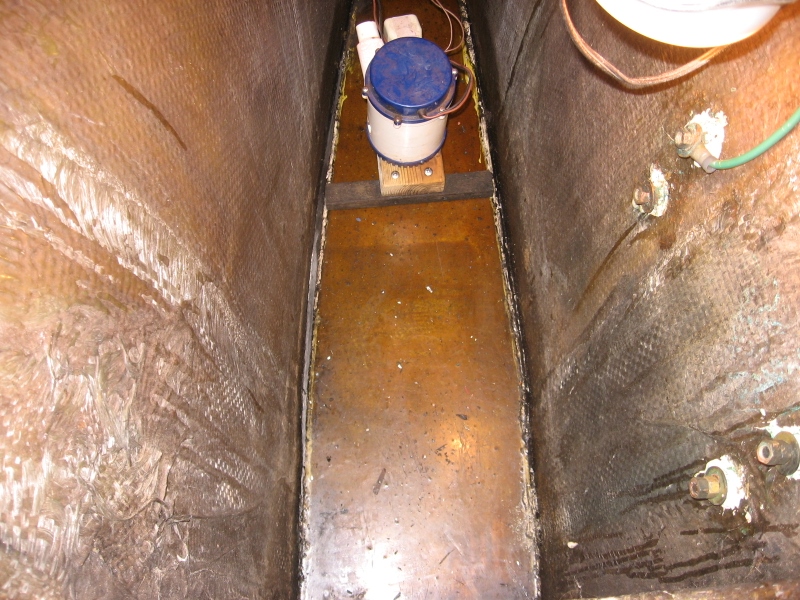
The PO filled the deepest part of the keel with, I believe he said epoxy. Now that I know the depth of the pour (I’ll explain in a minute) he did, I find it very hard to believe he even bought that much epoxy. The top had a nice sheen as epoxy or some kind of resin would leave. There was also a nice bead of 5200 all around the edge. It looked nice, it looked solid, easy to clean and vacuum out. Now it’s my nightmare.
I had told the yard owner and lift operator about not blocking the back end of the keel. I told them it was hollow and showed with my hands the approximate location of the lead. Figuring I had time to run out and get a quick breakfast in a warm restaurant as they were scrubbing the bottom (it was a record breaking cold day for Florida that morning) I took off sure I’d be back in time. Wrong.
I was told they were using a hammer to test the sound going aft and of course they were tapping down low about 8″ up from the bottom. Because of the filler (epoxy?) it sounded good and solid to them and they blocked it back about a third of the way into the void not feeling comfortable with blocking just up forward. When I got back, water was dripping (there was some in the bilge when I hauled) out the bottom. When I went inside and shined a light to my bilge…..the whole outer edge except at the keel had separated from the hull and got pushed up. The hull flexed out from the pressure. The next day they lifted me again and I placed the blocking from center of the lead edge and as far forward as possible and one small block about 6″ from the aft edge. The boat set down fine with the weight evenly distributed when the load was released from the straps, he said…”That felt better than yesterday” The hull inside the boat did not completely close back of course, so there is about a 1/4″ void all around for water to get in and under that filler. No good!
They ground the bottom and about a foot long crack showed up. They’ll take care of the bottom repair, as they should, but now I have the job of removing that monstrous hunk of whatever. I’ll add another layer or two of glass on the inside and leave well enough alone. I will not fill it. I’m going to leave that particular job for a few weeks and do thru-hulls, shaft, cutlass bearing first, then I’ll dig in the bottom. I’ll update my progress as I go.
I read the previous thread about this debate, to fill or not to fill. If you think about it, anything you poured, even if you clean the hull really good, will “pop” with that much pressure unless you physically attach it to the hull 360 degrees.
Ken
-
January 10, 2014 at 10:27 am #80473
unabated
ParticipantIf it’s separated from the hull you might try throwing in a couple of lag bolts with a hook and try lifting it up with a chain fall.
You might be able to get it up high enough, turn it sideways,and lift right out of there
Alan
Sent from my iPhoneOn Jan 10, 2014, at 2:31 AM, “Page Two” wrote:
The PO filled the deepest part of the keel with, I believe he said epoxy. Now that I know the depth of the pour (I’ll explain in a minute) he did, I find it very hard to believe he even bought that much epoxy. The top had a nice sheen as epoxy or some kind of resin would leave. There was also a nice bead of 5200 all around the edge. It looked nice, it looked solid, easy to clean and vacuum out. Now it’s my nightmare.
I had told the yard owner and lift operator about not blocking the back end of the keel. I told them it was hollow and showed with my hands the approximate location of the lead. Figuring I had time to run out and get a quick breakfast in a warm restaurant as they were scrubbing the bottom (it was a record breaking cold day for Florida that morning) I took off sure I’d be back in time. Wrong.
I was told they were using a hammer to test the sound going aft and of course they were tapping down low about 8″ up from the bottom. Because of the filler (epoxy?) it sounded good and solid to them and they blocked it back about a third of the way into the void not feeling comfortable with blocking just up forward. When I got back, water was dripping (there was some in the bilge when I hauled) out the bottom. When I went inside and shined a light to my bilge…..the whole outer edge except at the keel had separated from the hull and got pushed up. The hull flexed out from the pressure. The next day they lifted me again and I placed the blocking from center of the lead edge and as far forward as possible and one small block about 6″ from the aft edge. The boat set down fine with the weight evenly distributed when the load was released from the straps, he said…”That felt better than yesterday” The hull inside the boat did not completely close back of course, so there is about a 1/4″ void all around for water to get in and under that filler. No good!
They ground the bottom and about a foot long crack showed up. They’ll take care of the bottom repair, as they should, but now I have the job of removing that monstrous hunk of whatever. I’ll add another layer or two of glass on the inside and leave well enough alone. I will not fill it. I’m going to leave that particular job for a few weeks and do thru-hulls, shaft, cutlass bearing first, then I’ll dig in the bottom. I’ll update my progress as I go.
I read the previous thread about this debate, to fill or not to fill. If you think about it, anything you poured, even if you clean the hull really good, will “pop” with that much pressure unless you physically attach it to the hull 360 degrees.
Ken
Ken and Vicky # 91……Writing a New Chapter Page by Page in an Old Book.Attachments:
https://www.pearson424.org/bb2forum/files/img_6413_800x600_640x480_198.jpg
https://www.pearson424.org/bb2forum/files/img_6413_800x600_194.jpg_______________________________________________
maillist mailing listhttps://pearson424.org/mailman/listinfo/maillist_pearson424.org
_______________________________________________
maillist mailing listhttps://pearson424.org/mailman/listinfo/maillist_pearson424.org
Post generated from Pearson424 Forum using Mail2Forum
-
January 10, 2014 at 1:24 pm #80474
I might try that Allen but will be timid because of it’s still being attached at the forward end. maybe it will “pop” also once I start lifting. It might be brittle enough so that I can cut deep enough athwartship with a grinder and crack it. The sucker is at least 8″ thick because when it was fully spread I stuck a long skinny screwdriver down the side 8″.
Ken -
January 10, 2014 at 7:23 pm #80475
Adam Silverstein
ParticipantI hate to say it, but given my experience carving epoxy out of the deep bilge, I would consider cutting the section out and reglassing it. Weigh the relative cost and difficulty of forming and laying the glass versus what will seem like a lifetime of chipping, carving, grinding etc. Note that it will significantly shorten your life.
Adam
On Jan 10, 2014, at 2:31 AM, “Page Two” wrote:
The PO filled the deepest part of the keel with, I believe he said epoxy. Now that I know the depth of the pour (I’ll explain in a minute) he did, I find it very hard to believe he even bought that much epoxy. The top had a nice sheen as epoxy or some kind of resin would leave. There was also a nice bead of 5200 all around the edge. It looked nice, it looked solid, easy to clean and vacuum out. Now it’s my nightmare.
I had told the yard owner and lift operator about not blocking the back end of the keel. I told them it was hollow and showed with my hands the approximate location of the lead. Figuring I had time to run out and get a quick breakfast in a warm restaurant as they were scrubbing the bottom (it was a record breaking cold day for Florida that morning) I took off sure I’d be back in time. Wrong.
I was told they were using a hammer to test the sound going aft and of course they were tapping down low about 8″ up from the bottom. Because of the filler (epoxy?) it sounded good and solid to them and they blocked it back about a third of the way into the void not feeling comfortable with blocking just up forward. When I got back, water was dripping (there was some in the bilge when I hauled) out the bottom. When I went inside and shined a light to my bilge…..the whole outer edge except at the keel had separated from the hull and got pushed up. The hull flexed out from the pressure. The next day they lifted me again and I placed the blocking from center of the lead edge and as far forward as possible and one small block about 6″ from the aft edge. The boat set down fine with the weight evenly distributed when the load was released from the straps, he said…”That felt better than yesterday” The hull inside the boat did not completely close back of course, so there is about a 1/4″ void all around for water to get in and under that filler. No good!
They ground the bottom and about a foot long crack showed up. They’ll take care of the bottom repair, as they should, but now I have the job of removing that monstrous hunk of whatever. I’ll add another layer or two of glass on the inside and leave well enough alone. I will not fill it. I’m going to leave that particular job for a few weeks and do thru-hulls, shaft, cutlass bearing first, then I’ll dig in the bottom. I’ll update my progress as I go.
I read the previous thread about this debate, to fill or not to fill. If you think about it, anything you poured, even if you clean the hull really good, will “pop” with that much pressure unless you physically attach it to the hull 360 degrees.
Ken
Ken and Vicky # 91……Writing a New Chapter Page by Page in an Old Book.Attachments:
https://www.pearson424.org/bb2forum/files/img_6413_800x600_640x480_198.jpg
https://www.pearson424.org/bb2forum/files/img_6413_800x600_194.jpg_______________________________________________
maillist mailing listhttps://pearson424.org/mailman/listinfo/maillist_pearson424.org
Post generated from Pearson424 Forum using Mail2Forum
-
January 10, 2014 at 7:40 pm #80476
 RichCarterParticipant
Over the past few years, I’ve given serious consideration to filling the keel. I hate that deep sump. I have tools dropped down there that have been missing for decades. After hearing this horror story, I think I’ve dropped the idea of filling it. I considered dumping blocks of pressure treated wood down there and then filling the void with concrete. What stumped me was a good way to get the filler to stick to the inside of the sump. If water got in there, subsequent freeze/thaw cycles would cause the filler to separate from the keel.
Someone filled their keel with concrete and then glassed over the top many years ago. This may be #91. If so, you’ll need a jack-hammer to get rid of the stuff.
Rich
Original Message
Post generated from Pearson424 Forum using Mail2Forum
-
January 10, 2014 at 7:48 pm #80477
petedd
ParticipantRe tools dropping into the deep bilge, I have 1) installed an automotive
dome light under the sole and 2) keep one of those long
grab-things-off-the-shelf tools from Harbor Freight hanging right inside
the hatch to the bilge. Amazing how small and large of objects you can
pick up with one of those when you can see the object.Pete
On 1/10/2014 2:40 PM, wrote:
Quote:Over the past few years, I’ve given serious consideration to filling the keel. I hate that deep sump. I have tools dropped down there that have been missing for decades. After hearing this horror story, I think I’ve dropped the idea of filling it. I considered dumping blocks of pressure treated wood down there and then filling the void with concrete. What stumped me was a good way to get the filler to stick to the inside of the sump. If water got in there, subsequent freeze/thaw cycles would cause the filler to separate from the keel.Someone filled their keel with concrete and then glassed over the top many years ago. This may be #91. If so, you’ll need a jack-hammer to get rid of the stuff.
Rich
Original Message
Post generated from Pearson424 Forum using Mail2Forum
-
January 10, 2014 at 9:38 pm #80478
Tor
ParticipantKen,
If the filler doesn’t lift out with reasonable ease
from the inside with lag bolts, then I agree with Alan.
Cut the section open from underneath – it’s damaged
anyway – and drop/chop/blast out the filler crap. Then
rebuild the entire aft end of the keel foot twice as
thick as the original. I had my ‘glass-master do that
when I discovered what was probably an old,
covered-over, structural crack all along the keel
bottom beneath the sump section in Silverheels a couple
of years ago. Scary shit, considering I’d been doing
some offshore sailing with it that way. He ground it
back to the point that he could gently push a
screwdriver into the sump from the outside. Then he
rebuilt it heavy enough that I don’t have to worry
about blocking back there anymore – which, of course,
is what Pearson should’ve done in the first place. Do
it right once and you’re done with it.BTW, although that ‘glass-master’s shop is at Green
Cove Springs Marina, he makes house calls in the area –
in case you don’t have absolute faith in the ‘glass guy
at your yard.Tor
Silverheels, P-424 #17
http://www.silverheels.us
Quote:
Original Message
Post generated from Pearson424 Forum using Mail2Forum
-
January 10, 2014 at 11:55 pm #80479
Well Rich….that has me wondering, because ….I AM HULL #91. I’ll assume the PO would of told me concrete if he had done that, like I said he mentioned only epoxy…. but time will tell.
Honestly, if it is concrete under that shiny coating I’ll be happy. That means the whole thing has definitely “popped” away from the hull and the removal will be nothing but full on grunt labor, I’m good at grunt free labor and it never bothers me how much time to cost ratio bullshit it means. If I ain’t spending money, it stays in my pocket.
And I do have a small Bosch jack hammer. I am no stranger to that kind of work. Stay tuned. I will do everything in my power to not cut open the bottom of my boat for a 12″ crack!!!!!!
-
January 11, 2014 at 12:36 am #80480
Chuck Ruble
ParticipantKen, Mr. Shaw created a hull design that can be blocked anywhere along the keel. The keel is designed to carry the full weight of the vessel. It has to be. Boatyards are very unforgiving places for boats.
Our boats do have a deficiency where that well can become weakened due to age, damage, being dropped, moisture intrusion etc. Out of the mold the well would support the boat. Unfortunately it has a very good chance of becoming a problem.
I dealt with a similar issue and after doing some grinding found a sawzall more effective.
If the yard is repairing it their expense you are VERY lucky. If you can work with them and fix it right you should. To do it right you need to remove the rig. You are going to have most all the load on the ballasted section of the keel. You can block under the skeg but it should be for stability, not carry a big load.
Don’t be intimidated by this repair. Glass work is pretty straight forward. Look at this post, you can see what me and my girlfriend accomplished. I now insist the boat be blocked under the well. Strong like bull…
https://www.pearson424.org/bb2forum/viewtopic.php?t=1890&highlight=cracked+keel
The well is good, keep the well. Holds lots of water in one spot (no shifting loads) rather than sloshing about the boat (like in a Beneteau) soaking everything until it gets pumped out.
If you can get that block of crap out of the keel I would. It probably trapped moisture under it which found another way out of the boat.
Chuck
-
January 11, 2014 at 12:59 am #80481
madsailor
ModeratorHaving just fixed that crack this September, I can offer this: it is
almost certainly larger than you see.I ended up with 9 layers of biaxial cloth working it’s way up the keel
about 18 inches.You are far better cutting and layering the whole distance from the ballast
to the end pf the keel than fixing the 12 inches.IMHO.
Bob
Pardon the brevity. I’m typing this on my phone and I hate typing on my
phone.
On Jan 10, 2014 6:55 PM, “Page Two” wrote:Well Rich….that has me wondering, because ….I AM HULL #91. I’ll assume
the PO would of told me concrete if he had done that, like I said he
mentioned only epoxy…. but time will tell.Honestly, if it is concrete under that shiny coating I’ll be happy. That
means the whole thing has definitely “popped” away from the hull and the
removal will be nothing but full on grunt labor, I’m good at grunt free
labor and it never bothers me how much time to cost ratio bullshit it
means. If I ain’t spending money, it stays in my pocket.And I do have a small Bosch jack hammer. I am no stranger to that kind of
work. Stay tuned. I will do everything in my power to not cut open the
bottom of my boat for a 12″ crack!!!!!!
Ken and Vicky # 91……Writing a New Chapter Page by Page in an Old Book._______________________________________________
maillist mailing listhttps://pearson424.org/mailman/listinfo/maillist_pearson424.org
_______________________________________________
maillist mailing listhttps://pearson424.org/mailman/listinfo/maillist_pearson424.org
Post generated from Pearson424 Forum using Mail2Forum
-
January 11, 2014 at 1:07 am #80482
Chuck, I saw these pictures and my gut says YES this is the way to fix this flaw once and forever. No doubt, if I go this route the yard will not cover the costs. At present they will cover the fix from the bottom only, two or three layers applied from the bottom spread a goodly distance from the crack. This is why I have put this repair on my last to do list while my planned one month out of the water moves along. I understand that glass work is straight forward and this upgrade to the bottom of the boat can be done at a reasonable cost, it’s just a bunch of layed up fiberglass. I’m giving my brain some time to sort it out and I poke and probe at the end of every day here on the hard, working hard, working dirty, and after 4, drinking hard. I appreciate all the feedback from this forum, it’s a great place to toss around ideas.
Thanks,
Ken -
January 11, 2014 at 1:13 am #80483
I agree Bob!…….just need some time to sort, poke, dig, grind, chip, haul and filter the whole project through my addled bottom paint stained brain.
Thru-hulls first…
Shaft and strut second…
Gaping hole in bottom third!Ken
-
January 11, 2014 at 2:13 am #80484Participant
It’s simpler than you realize. Cut the pie piece out, I didn’t go all the way to the ballast. I just cut till I got to clean dry laminate. Realized after the fact it might have been easier. The cut from the back of the keel was around 30 inches long. About 4-6 inches up from the bottom.
Mark the cut with laser if you can. The cleaner and straighter the cut the easier the rebuild.
Create a laminate stack of solid FRP. You can purchase a 4×4 sheet of 3/8th FRP and probably have more than enough. Tab in some cross supports in the opening in the keel and some cleats on the sides/end to attach to. Make you new pie section, only has to be reasonably close.
Secure it to the bottom (screw and glue). Shape with a grinder and some 30 grit THEN wrap with glass.
I ground the profile of the keel to build it back up with the glass wrap so it didn’t bulge with the new wrap.I made a mock up of the filler piece out of wood before I started cutting up an expensive piece of FRP.
The wrap is best done with vacuum bagging. I’d leave that to a pro as it is an art that comes with practice. Set up and applying roughly 4 wraps of 1708 should take about 4 hours total, two guys to do it right, 8 labor hours. If you don’t bag it, it will sag.
You can smooth and fill it, barrier coat and paint.
Working in the bottom of the well from the inside is next to impossible. Working on the same area from outside the boat is amazingly easy.
I thought about putting a garboard plug on the side near the bottom while I was down there but decided I wasn’t that important. Probably would have been worth the effort.
Chuck
-
January 11, 2014 at 2:58 am #80485Moderator
That’s way too hard, Chuck. Grind the crack to clean and dry glass. Build
up with successively wider strips of biaxial glass with thickened resin
wetted out thoroughly. 9 layers should do it. Actually, 7 is good.Fair with thickened epoxy. Sand and paint.
Pardon the brevity. I’m typing this on my phone and I hate typing on my
phone.
On Jan 10, 2014 9:13 PM, “Chuck Ruble” wrote:It’s simpler than you realize. Cut the pie piece out, I didn’t go all the
way to the ballast. I just cut till I got to clean dry laminate. Realized
after the fact it might have been easier. The cut from the back of the
keel was around 30 inches long. About 4-6 inches up from the bottom.Mark the cut with laser if you can. The cleaner and straighter the cut
the easier the rebuild.Create a laminate stack of solid FRP. You can purchase a 4×4 sheet of
3/8th FRP and probably have more than enough. Tab in some cross supports
in the opening in the keel and some cleats on the sides/end to attach to.
Make you new pie section, only has to be reasonably close.
Secure it to the bottom (screw and glue). Shape with a grinder and some
30 grit THEN wrap with glass.
I ground the profile of the keel to build it back up with the glass wrap
so it didn’t bulge with the new wrap.I made a mock up of the filler piece out of wood before I started cutting
up an expensive piece of FRP.The wrap is best done with vacuum bagging. I’d leave that to a pro as it
is an art that comes with practice. Set up and applying roughly 4 wraps of
1708 should take about 4 hours total, two guys to do it right, 8 labor
hours. If you don’t bag it, it will sag.You can smooth and fill it, barrier coat and paint.
Working in the bottom of the well from the inside is next to impossible.
Working on the same area from outside the boat is amazingly easy.I thought about putting a garboard plug on the side near the bottom while
I was down there but decided I wasn’t that important. Probably would have
been worth the effort.Chuck
_______________________________________________
maillist mailing listhttps://pearson424.org/mailman/listinfo/maillist_pearson424.org
_______________________________________________
maillist mailing listhttps://pearson424.org/mailman/listinfo/maillist_pearson424.org
Post generated from Pearson424 Forum using Mail2Forum
-
January 11, 2014 at 2:58 am #80486RichCarterParticipant
Ken and Vicky,
Check the archives. Maybe there’s a thread about filling the keel. It’s been discussed many times over the years. Sorry, I don’t remember the details.I’ve hauled and shipped my boat home for the past 27 years. I’ve always blocked both the keel and the rudder skeg, blocking only the forward half of the keel. While it may be possible to block the aft section of the keel, I don’t want to take chances. Blocking the skeg is probably not necessary but it makes me feel better. I take personal charge positioning the jackstands and blocks. While the folks working in the yard mean well, they don’t know the 424 and some of them don’t know the pointy end from the blunt end.
Rich
Original Message
Post generated from Pearson424 Forum using Mail2Forum
-
January 11, 2014 at 12:34 pm #80487Participant
I don’t understand the popular compulsion to fill in
the deep sump in the 424. What would that accomplish?
Actually, that deep well was one of the design features
that attracted me to the boat in the first place,
someplace a lot of water can go (and be pumped out)
without sloshing around underneath the cabin sole and
up into the side lockers in a seaway. Also, I can
physically squeeze in down there, just barely at the
forward end like a mummy, but enough to reach aft with
a longish handle. First thing I did was thoroughly
clean and rough-sand the entire sump and paint it
white. This way I see trouble brewing, be it water
intrusion or oil dripping. Things that fall down there
are easily spotted and reached with one of those long
grabber tools or a magnet-on-a-rod. Periodically I
flush the sump out with clean seawater, and very
occasionally scrub it with soap & water. No mess, no
oil, no odor, no tool abyss. I’ve thought of setting a
couple of storage crates halfway down in there, but
like being able to see into it.Tor
Silverheels, P-424 #17
http://www.silverheels.us
Quote:
Original Message
Post generated from Pearson424 Forum using Mail2Forum
-
January 11, 2014 at 2:25 pm #80488
After what’s happened to me no one should consider filling it. Beef it up more from inside or outside but not fill.
Now I can see glassing in some cleats and having a removable platform down there. The height of my pour, about 8 or 9 inches makes it perfect for storing sealed 5 gallon jugs. Two fit fore and aft and then two more on top. The PO boasted of being able to get 5 or 6 of them down there filled with beer for his trip to the Bahama’s. I like the idea of a 5 gallon jug of motor oil and my 5 gallon jugs full of peat moss (loving the compost head so far) stuffed down there. I understand any loose objects in the bilge can mean trouble and even more so after taking out all my thru-hulls this week. The most full thread any of them had was 4 1/2 threads. If any of you still have any of the original bronze sea-cocks with no backing plate, no thru-bolts and the old silicone…TAKE THEM OUT NEXT HAUL. Here is what I found of the large valve under the captains bed. The port aft scupper drain with less than two full turns of threads.
Sorry…working on getting the picture in here. This should do it http://pagetwo88.blogspot.com/ click on the picture.
Ken -
January 11, 2014 at 4:10 pm #80489RichCarterParticipant
Tor
Either you’re smaller than me or your sump is bigger. If I got down there, you’d need the jaws-of-life to get me out. At some point in time, someone did some glass work down there and then dropped the bilge pump hose back down before the epoxy dried. A section of hose is now glued to the bottom of the bilge. This means that I can’t get to the bottom for cleaning or even to pump the sump dry. I power wash the bottom every now and then and use a shop vac to get the water out. This is a bit of a waste of time since water soon finds its way back in there. A splash of bleach keeps the odor down. If the sump were just about 18″ higher I could reach the bottom for cleaning.Regards
Rich
Original Message
Post generated from Pearson424 Forum using Mail2Forum
-
January 12, 2014 at 1:40 am #80490Participant
I see your dilemma, Rich. If I were too big to reach in there myself, I’d hire an elf to give the space a proper cleaning, straighten out the mess the last guy left, and put on a few coats of white paint. One time and it’s done. After that a long-handled scrubber and occasional rinses should enable you to keep it tolerably clean.
Or you could just avoid ever looking in there. That seems to work for most boat owners. 🙂
Tor
Silverheels, P-424 #17
http://www.silverheels.us
Quote:
Original Message
Post generated from Pearson424 Forum using Mail2Forum
-
January 15, 2014 at 11:39 pm #80543
I got the sucker out….in three pieces.
I used the advice I got here and hooked up a come-along to finish breaking the mass of (concrete/mortar type stuff) free from the inside of the hull. It was not difficult, heavy, but not difficult. It was probably never really attached from the very beginning. It came out all black, no doubt holding a thin layer of moisture and crud between it and the hull. I am so glad this mass is gone from the boat. I will try to post pictures here but have had trouble re-sizing them to fit. I had to use my large hammer drill to drill a series of holes across the mass and beat with a very large hammer until it breaks. I made three pieces.
Anyway, I certainly would not recommend filling the bottom of the bilge unless you extensively grind everything to clean fiber of all that will be filled and then glass a heavy fillet on top of that.I’ll get some pics on the blog.
Ken
-
January 16, 2014 at 1:03 am #80544Moderator
Congratulations! One yucky job done!
Ps. Good meeting you the other day!
Pardon the brevity. I’m typing this on my phone and I hate typing on my
phone.
On Jan 15, 2014 6:39 PM, “Page Two” wrote:I got the sucker out….in three pieces.
I used the advice I got here and hooked up a come-along to finish breaking
the mass of (concrete/mortar type stuff) free from the inside of the hull.
It was not difficult, heavy, but not difficult. It was probably never
really attached from the very beginning. It came out all black, no doubt
holding a thin layer of moisture and crud between it and the hull. I am so
glad this mass is gone from the boat. I will try to post pictures here but
have had trouble re-sizing them to fit. I had to use my large hammer drill
to drill a series of holes across the mass and beat with a very large
hammer until it breaks. I made three pieces.
Anyway, I certainly would not recommend filling the bottom of the bilge
unless you extensively grind everything to clean fiber of all that will be
filled and then glass a heavy fillet on top of that.I’ll get some pics on the blog.
Ken
Ken and Vicky # 91……Writing a New Chapter Page by Page in an Old Book._______________________________________________
maillist mailing listhttps://pearson424.org/mailman/listinfo/maillist_pearson424.org
_______________________________________________
maillist mailing listhttps://pearson424.org/mailman/listinfo/maillist_pearson424.org
Post generated from Pearson424 Forum using Mail2Forum
-
January 16, 2014 at 1:13 am #80545
Thanks Bob,
it was good to meet you too!Well, the initial yucky in getting them out is done but there will be some serious cleaning (my lovely wife Vicky fits very well down there and is willing!) and re-glassing ahead.
http://pagetwo88.blogspot.com/Ken
-
-
AuthorPosts
- You must be logged in to reply to this topic.