Forum Replies Created
-
AuthorPosts
-
Discoverie
ParticipantGlad the electric conversion went well.
Roger-
This reply was modified 4 years, 10 months ago by
Discoverie.
ParticipantInteresting, Discoverie is a ’83 cutter (#203) and it has a solid hull. I’ve either closed or put in enough new thru hulls to have a reasonable sample of the hull. And so far, no core encountered. In fact, in most places the hull is quite thick–3/4″ or so.
It depends on the year. Our 1983 Plan C Cutter has a cored hull. Older hulls are solid. We only found a small area of delamination and had it repaired. There was no water intrusion or rot, it was probably a void in the lay up from the factory that we found after an extensive survey. Other than that we haven’t had any issues with it.
As for how to tell? Cored hulls typically have a transition somewhere along the side where the cored portion begins, if it is the same thickness all the way up it is more likely to be solid. You can also inspect around thru-hulls to see if they cut away the core and made it solid fiberglass. This would point to having a core.
As for opinion on a cored hull? If we could trade our hull for a solid core we might… but as long as the boat has been taken care of (i.e. regular haul outs, well installed thru-hulls) and a good hull survey doesn’t show any problems I wouldn’t make it a deal breaker. They are actually stronger per pound or lighter per unit strength depending on what the designers went for…
Regards,
Bryan Bywalec
S/V Pelican-
This reply was modified 5 years, 9 months ago by
ParticipantHi Rich,
Does the memory foam hold up when the ambient temperature is elevated?
Tkx,
RogerParticipantThat’s beautiful work. Looking forward to getting my to-do list under control so that I can try to emulate your success.
On the hatch, I also put on there. It’s currently providing plumbing and electrical access. But I hope that it’s future will be for wine storage.
ParticipantThanks for this. I’ve got a similar project underway. The mattress from hip level up will be expanded in a trapezoida-ish shape so that the top half is about 8” inside the doorway.
I need to create fiddles for this and a few other galley upgrades. Did you shape fiddles yourself or were you able to find some ready made?
ParticipantDup removed
ParticipantHad a similar problem with a different engine. I think that if you have good raw water flow and the heat exchanger is in good shape then the problem is on the coolant side. Air lock is one possibly—when you open the coolant cap do you see coolant? If you remove the sender and pour water into the coolant area, does water/coolant come out (and that stuff is toxic to pets and wildlife so be careful). When my engine had air lock I had to fill then run the engine for 30 seconds and repeat five times before I got all the air out.
Given that you recently removed and replace the heat exchanger, my guess is air lock. The only remaining possibility is that the thermostat is failing to open.
ParticipantI thought of having my old w58 rebuilt but the parts, labor and shipping cost was going to be quite expensive (didn’t have time to do it myself). Bought a new Nanni n4.65 and, after a number of delays, got it installed. Too early to give you a report but will post a full update with photos hopefully soon.
Here were some of my considerations I used
* Wanted a older non-common rail fuel system. These have more complex electronics, and I preferred to avoid electrics that would be hard to support in remote locations
* Wanted a horsepower curve similar to the W58
* Needed global parts availability
* Was getting more engineering details from Nanni support than the salesish language from BetaSome surprises
The area around the installed fiberglass engine bed didn’t drain well and I needed to remove it anyway so out it went. Then I found that the strut mount had been leaking and we had to drop the strut and remove or dry out lots of materials between the strut and the engine bed. Much grinding fiberglass work and little joy. Had help from a friend and amazingly he’s still a friend.Advice. If you need to rebuild the engine bed, build a full size rig that has the exact position of the engine mounts and all the key points at the engine’s parameters—I missed the banjo bolt at the base of the oil pan and had a bit of carving to make it all fit. And if you use wood for the supports, use white, not red oak. It’s said to have good rot resistance. I tabbed and wrapped mine in about 1/4” of fiberglass. Be sure to make some drainage hold so water isn’t retained.
BTW, if I can find time and parts I plan to rebuild the old w58 and sell it, but not sure when that will happen.
ParticipantIf you have a radiator shop in your area, they can boil it out. Id test for leaks before reinstalling as this looks to be a pretty old heat exchanger. If you are in the market for a new one, Lenco on Long Island, NY can build a replacement based on your existing one. I’ve used them and know others who have. I can’t remember what I payed. But it was probably about $200+.
ParticipantAhoy,
I recently repowered Discoverie, and when I started to research the power train I found The Propeller Book by Dave Gerr. I think used copies in paperback are available for about $15, shipping included.Gerr has written quite a collection of books and articles— you can a list of them here at his site http://gerrmarine.com. Hopefully others with W58s can give advice based on experience, but my W58was on its last legs so I don’t have good data for you. I stuck with the flexifold the PO had installed and used that as a constant when selecting an engine.
Understanding the optimum prop for your vessel will include knowing the power at the shaft. Gerr’s Book does a good job of explaining the details.
Here’s a link to one of his articles on blade area in Sail magazine. https://www.sailmagazine.com/diy/propeller-blade-area
ParticipantI’ve got similar concerns about leaks, core rotting and soft spots on the deck and under the headliner. I haven’t yet taken on the deck yet but my approach in the main cabin has been this:
I removed the headliner and with a Tramex moisture meter I mapped out wet locations. (I did start with a basic meter, but after seeing how much more sensitive a built-for GRP meter was, I ponied up.) The upshot is that almost everywhere something penetrates the core, there is some moisture. I had already rebedded the port lights. And on the ceiling, deck hardware was removed. Using a one inch drill saw bit, from below I drilled the core from each hardware attachment point. I then used gorilla tape to cover the one inch hole on the ceiling. Then from the outside I injected six/ten epoxy into the cavity. When the epoxy cured I drilled new holes for the hardware and rebedded with butyl tape. I plan to finish this by glassing in a patch over each of these plugs to give the assembly a bit more grip. I’ll have to remove the deck hardware (again!) for that so it’ll wait until I repaint.
All the hatches were leaking somewhat, with a friend we removed and rebedded them. The sea hood was then removed and the area around the port side companionway was resealed. There is still the mast hole and the area around the cabin heater to attend to.
The big question remaining us what to do about the damaged core in the cabin ceiling. The moisture around the companionway and a few of the hatches is extensive. We tried to use a long drill bit to carve out the rot, and this works for five or so inches, but our attempts to inject epoxy into an area that large created quite a mess. And some moisture has penetrated well beyond it’s likely entry location. At this point, I’m seriously considering just cutting the fiberglass ceiling from below replacing the wet sections with new balsa, and reattaching the original fiberglass.
But having sealed the worst leaks, replacing the rotten core has been put on hold as I’m in the (hopefully) final stages of repowering with a Nanni 4.65. Will post on that project when done.
ParticipantSounds like there were a few crossings on the way to Barbados. Please post notes especially anything that will be helpful to those following in your wake.
ParticipantWelcome aboard! I think you’ll find the P424 group friendly, well-informed and helpful. Our boat is also a 1983 cutter, though I’m not sure of its plan designation. I’m well into a significant refit and may have taken on some of the work you’re considering. Let me know if I can be of assistance.
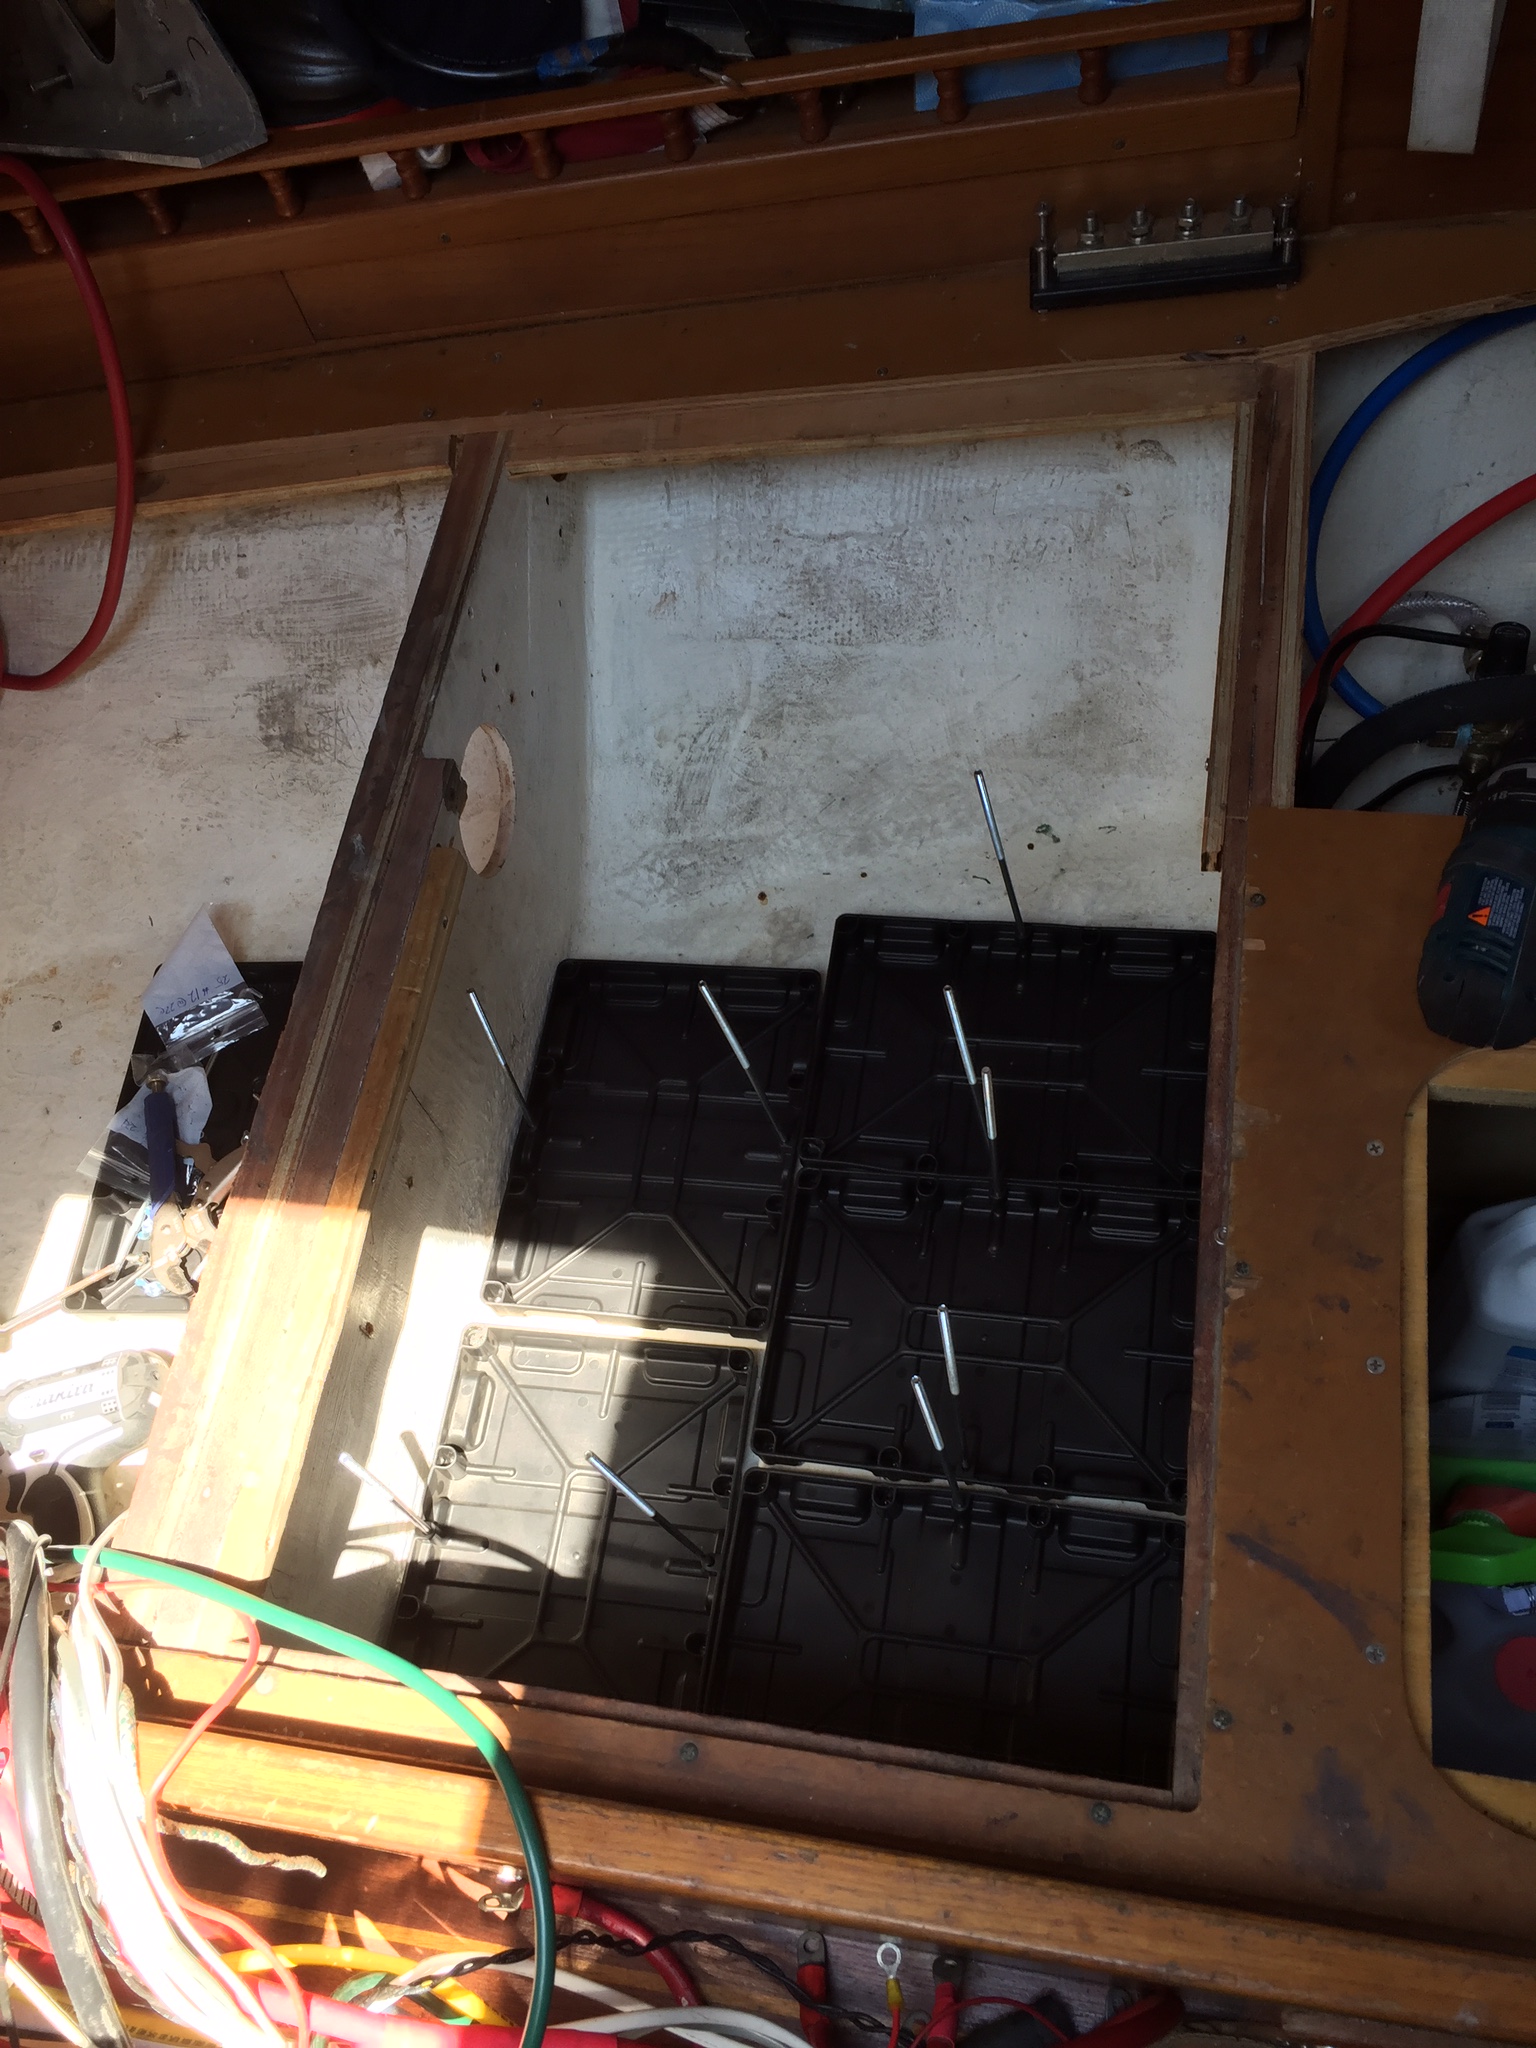
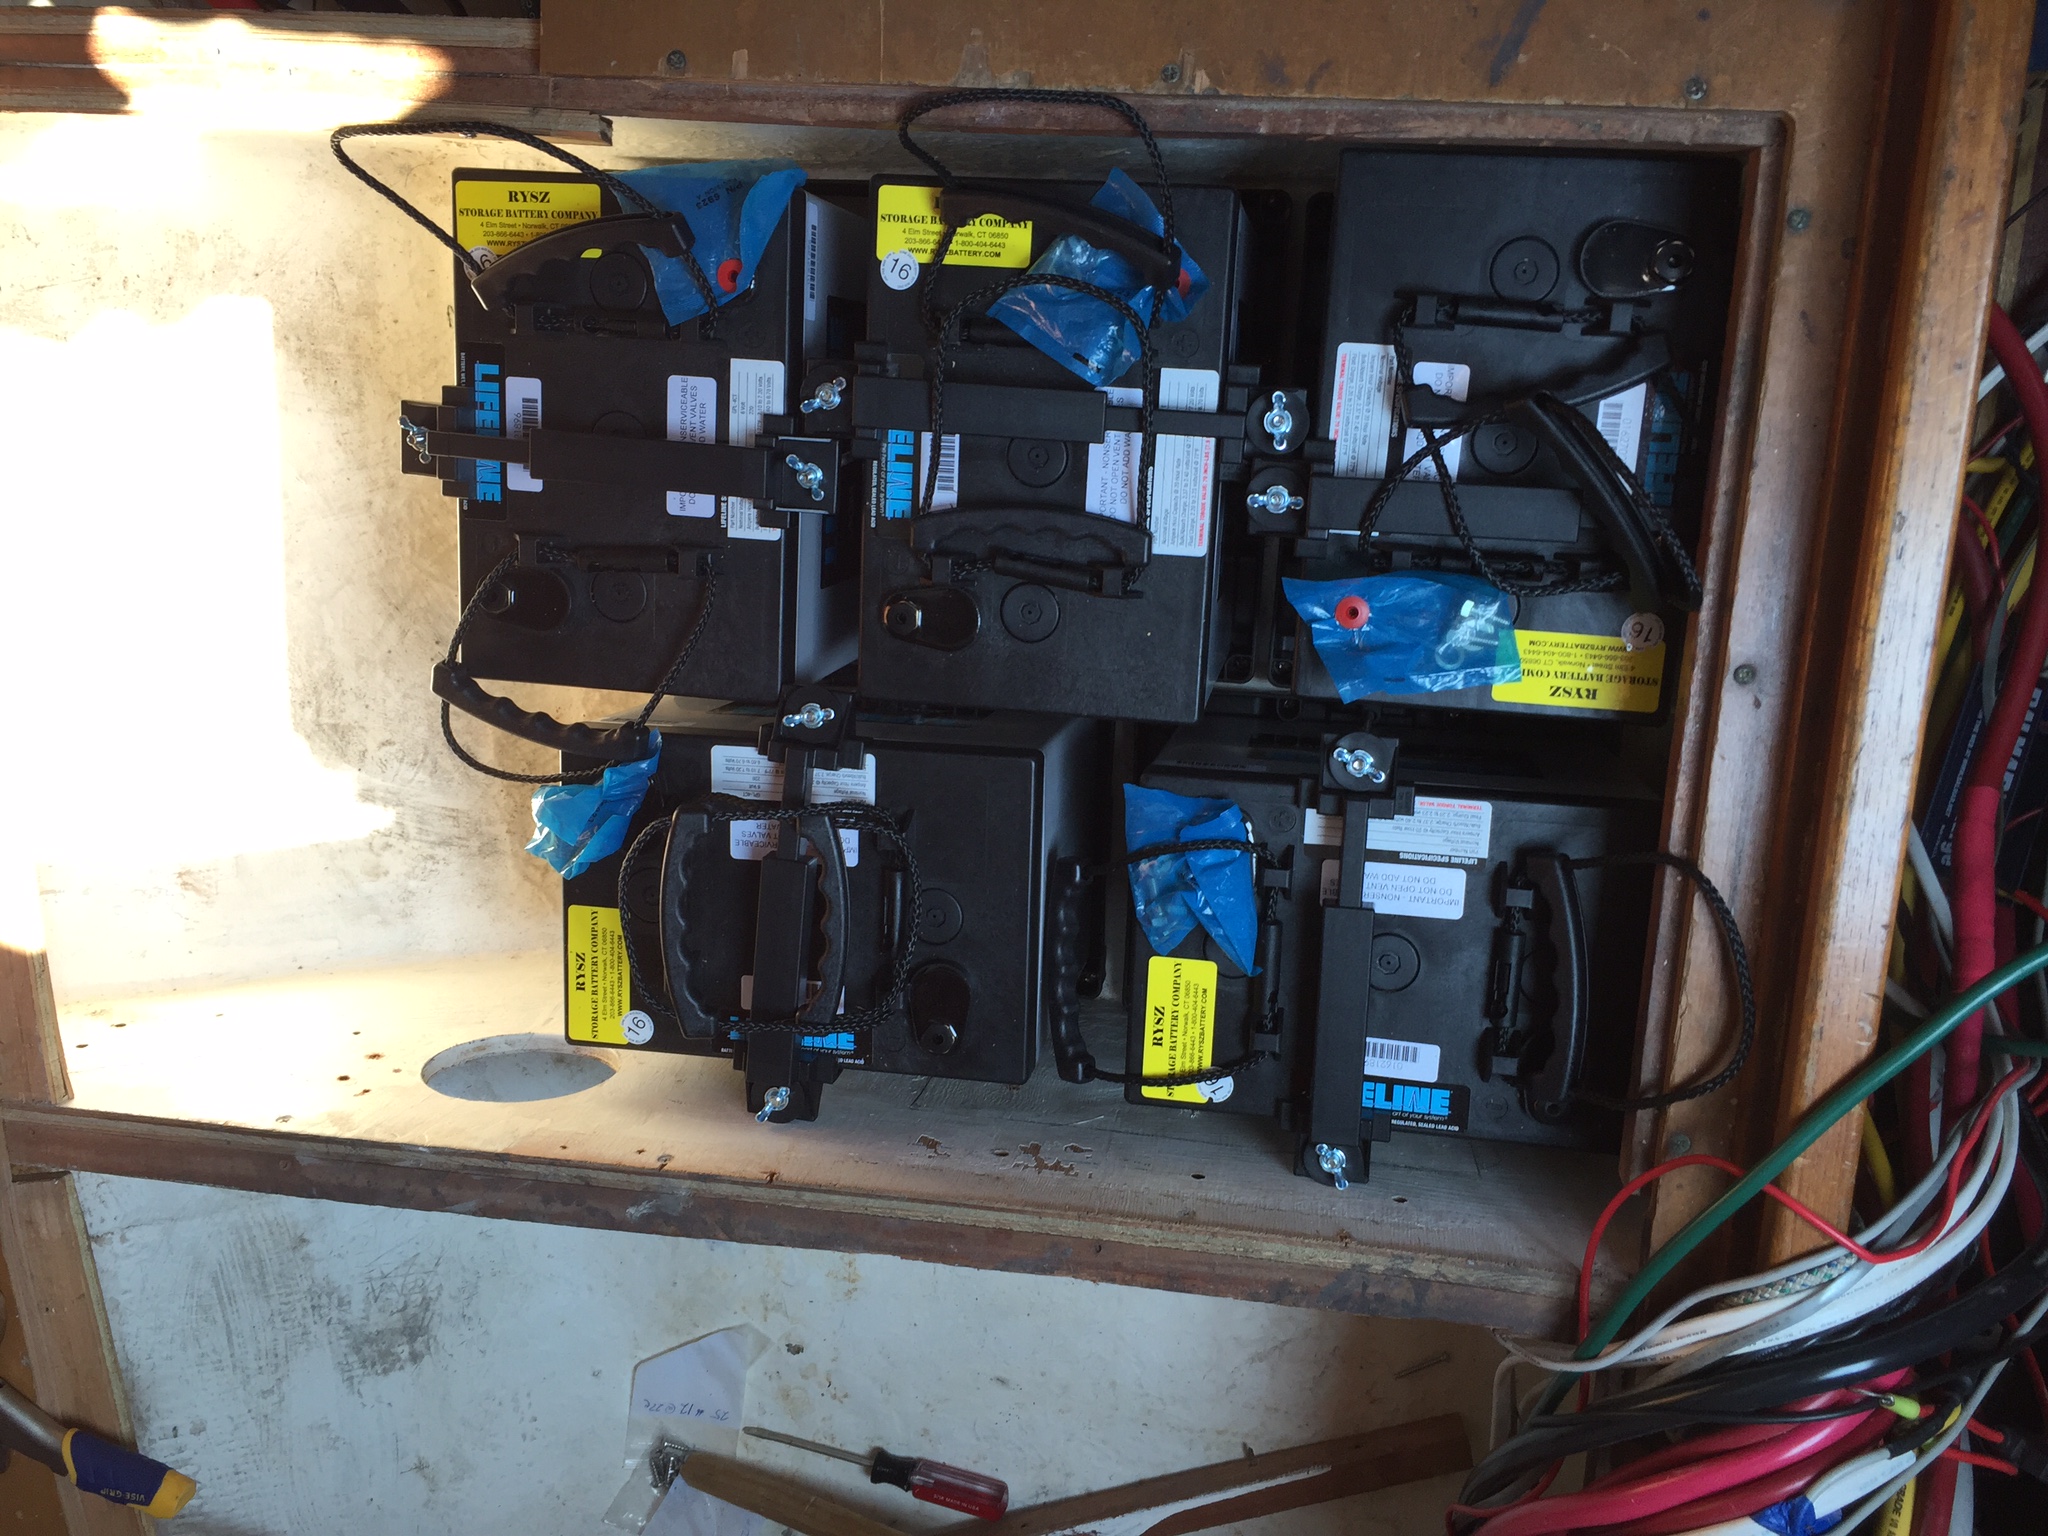
ParticipantWhen I bought my cutter she had 4@4D under the aft berth, two in each of the aft-most compartments. These were AGM so there was not a lot of vent consideration. However there is an approximately 4×5 vent, but this is largely to provide some circulation to the inverter, which is also under the berth. After hernia surgery, I replace the 4Ds with 6@6volt Lifeline batteries. I also have a 12v starter battery and my water heater under the berth.
I don’t have pics of the 4Ds, but I’ll try to post how I setup the 6@6v. There are four sections under the berth, I’m using the aft two to hold batteries.
Attachments:
6121EE08-4436-453E-BA12-E94BAB9AA44A.jpeg
6C1E72BA-C4E6-4611-B58C-A966281837DF.jpeg
ParticipantQuestion should read:
To those of you who have pulled your engine, is this a normal installation, or has it been changed? If it was changed, what did normal look like? While I’ve got the engine out, I can fix things up.
Tkx,
rb -
This reply was modified 4 years, 10 months ago by
-
AuthorPosts